Spring is all around us, from the blooming redbuds and chocolate chip ajuga (my personal favorite) alongside the cheerful melodies of nesting birds. Let’s bid farewell to winter’s starkness and bring some charm and color to that porch! Stepping into the lively season of spring is easier than you think with the right combination of plants, pots, and process of crafting it. Let’s explore the essentials to help you create a botanical wonder, that elevates your outdoor space and inspires your neighbors!
Plants: Blooms with Color
To create a captivating container garden that flourishes in the Middle Tennessee climate, it’s essential to select plants that not only tolerate but thrive in our conditions. Here are some delightful spring-flowering plant options:
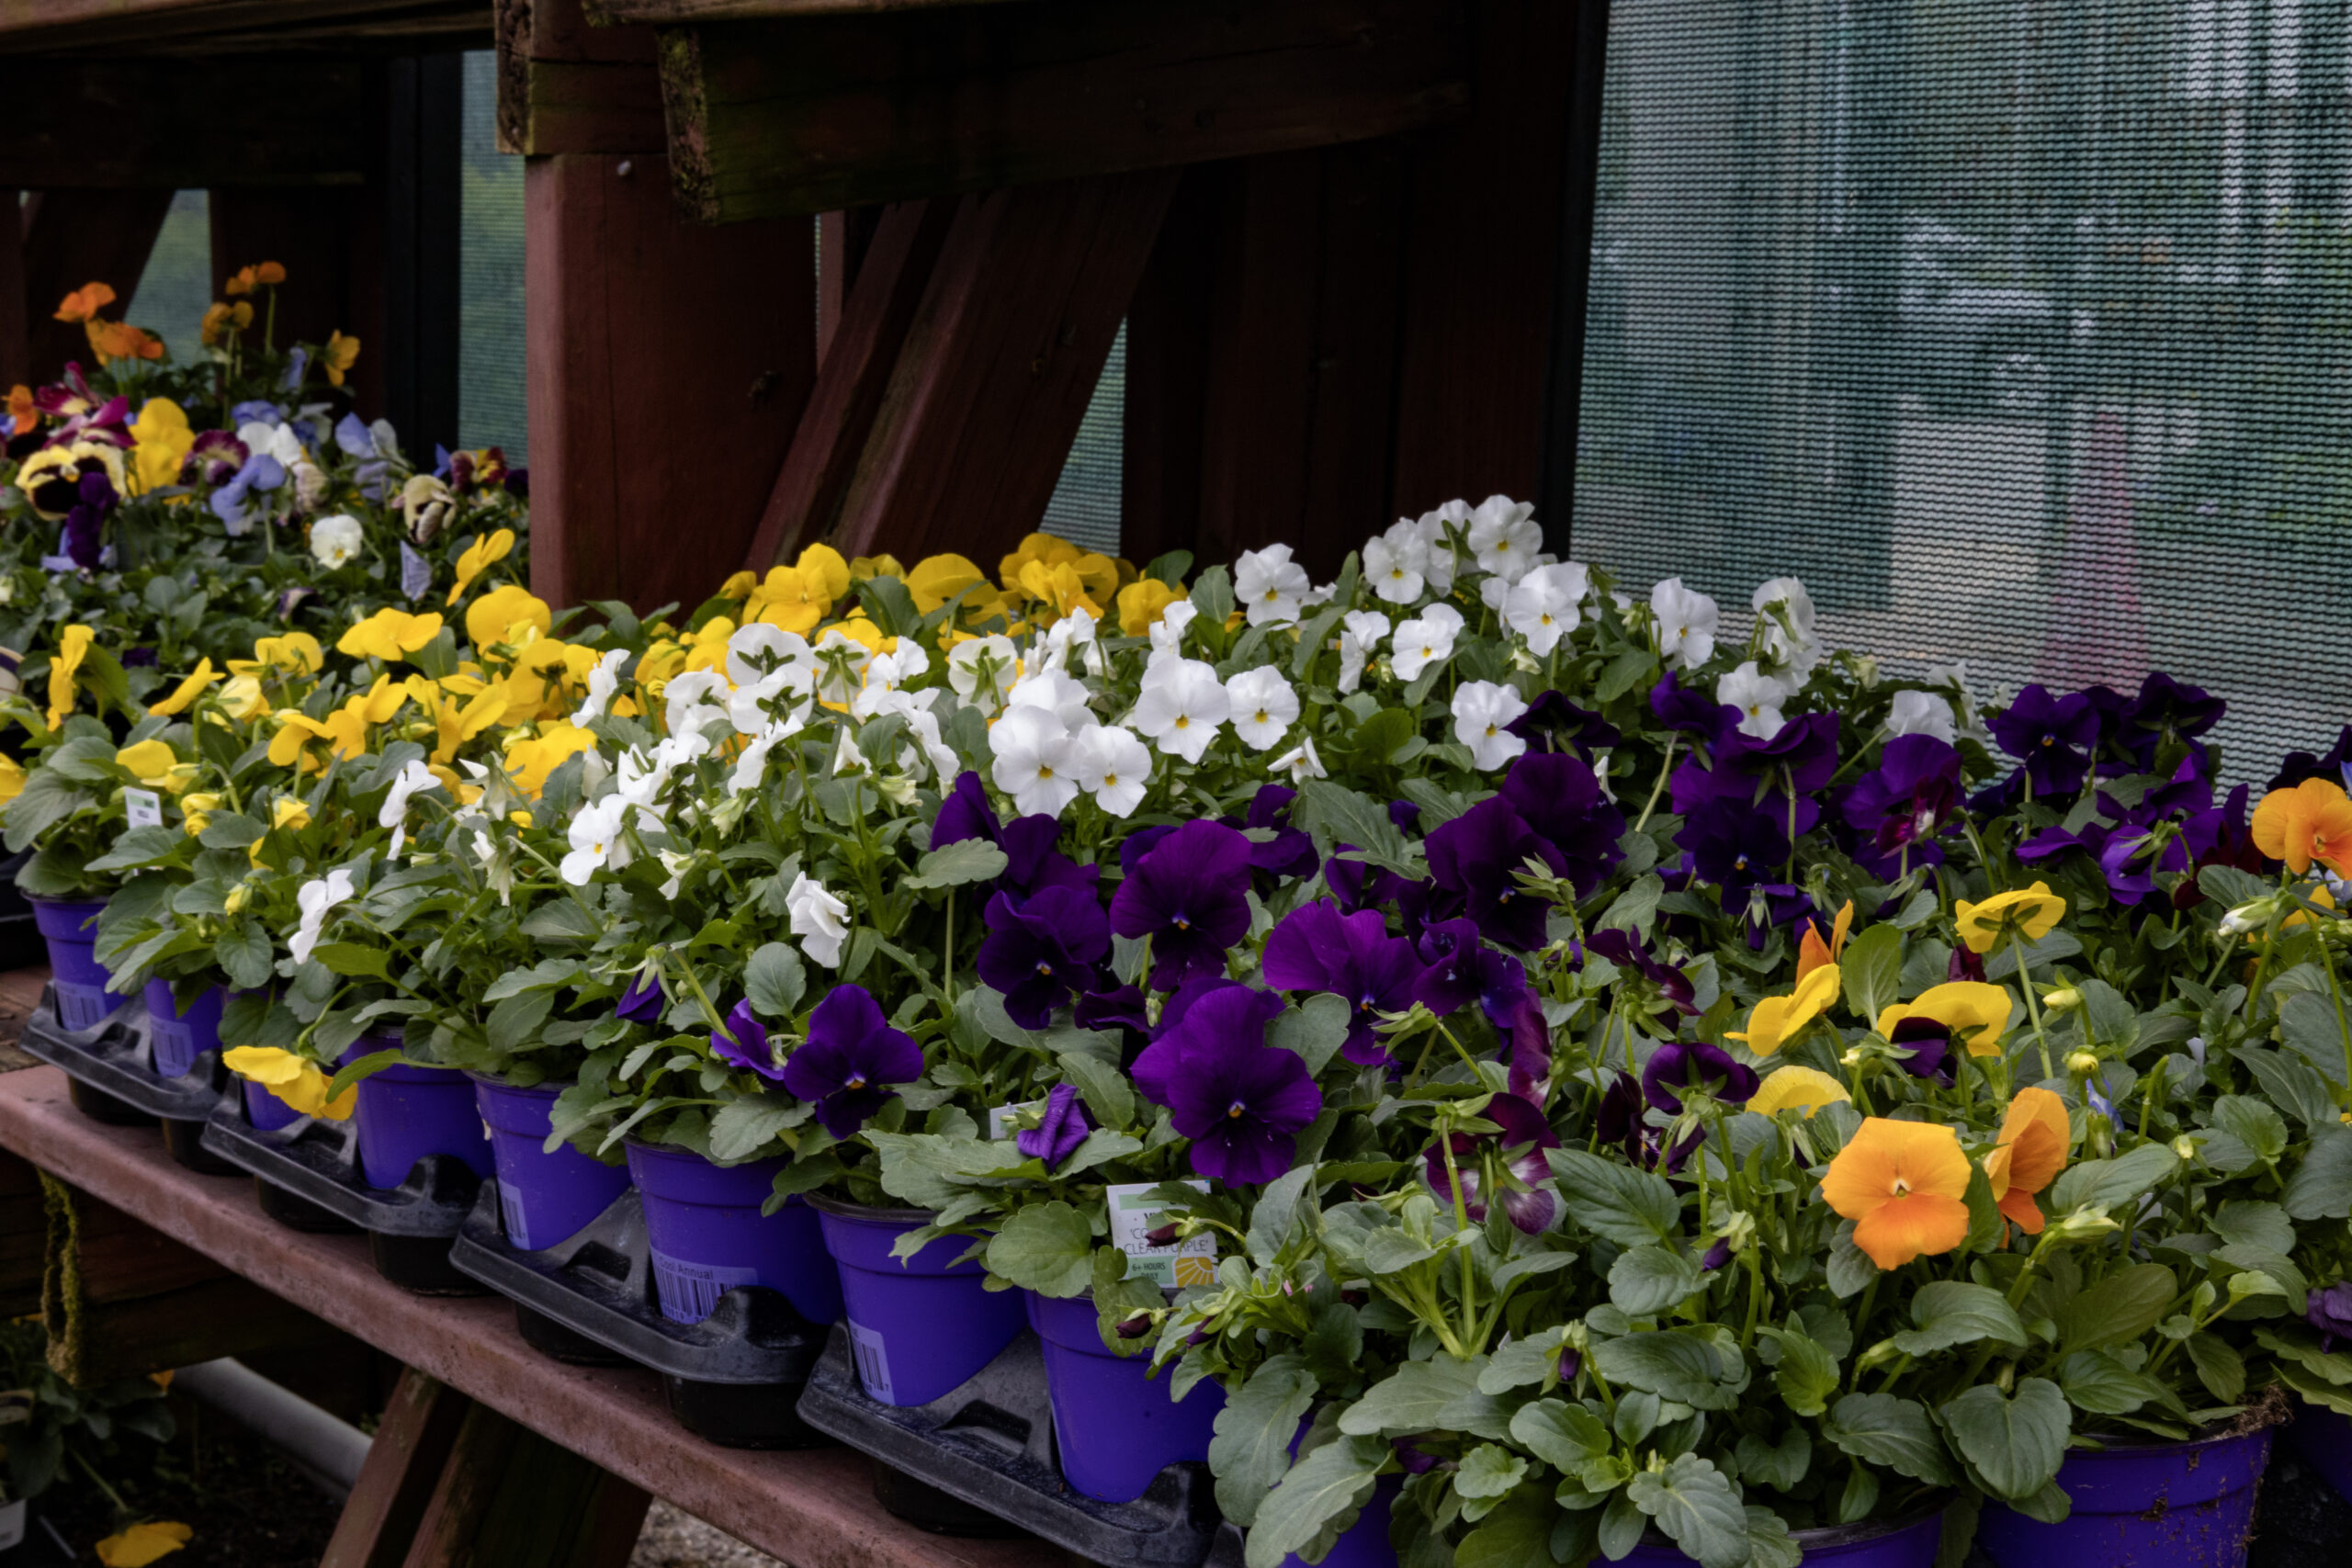
Pansies (Viola × wittrockiana)
Bloom Time: Pansies typically bloom from early spring until the heat of summer.
Colors: Pansies come in a wide array of colors, including purple, yellow, orange, and blue.
Cool Fact: Pansies are not just pretty faces – they’re edible too! These charming blooms are often used to garnish salads or desserts, adding a pop of color and a subtle floral flavor.
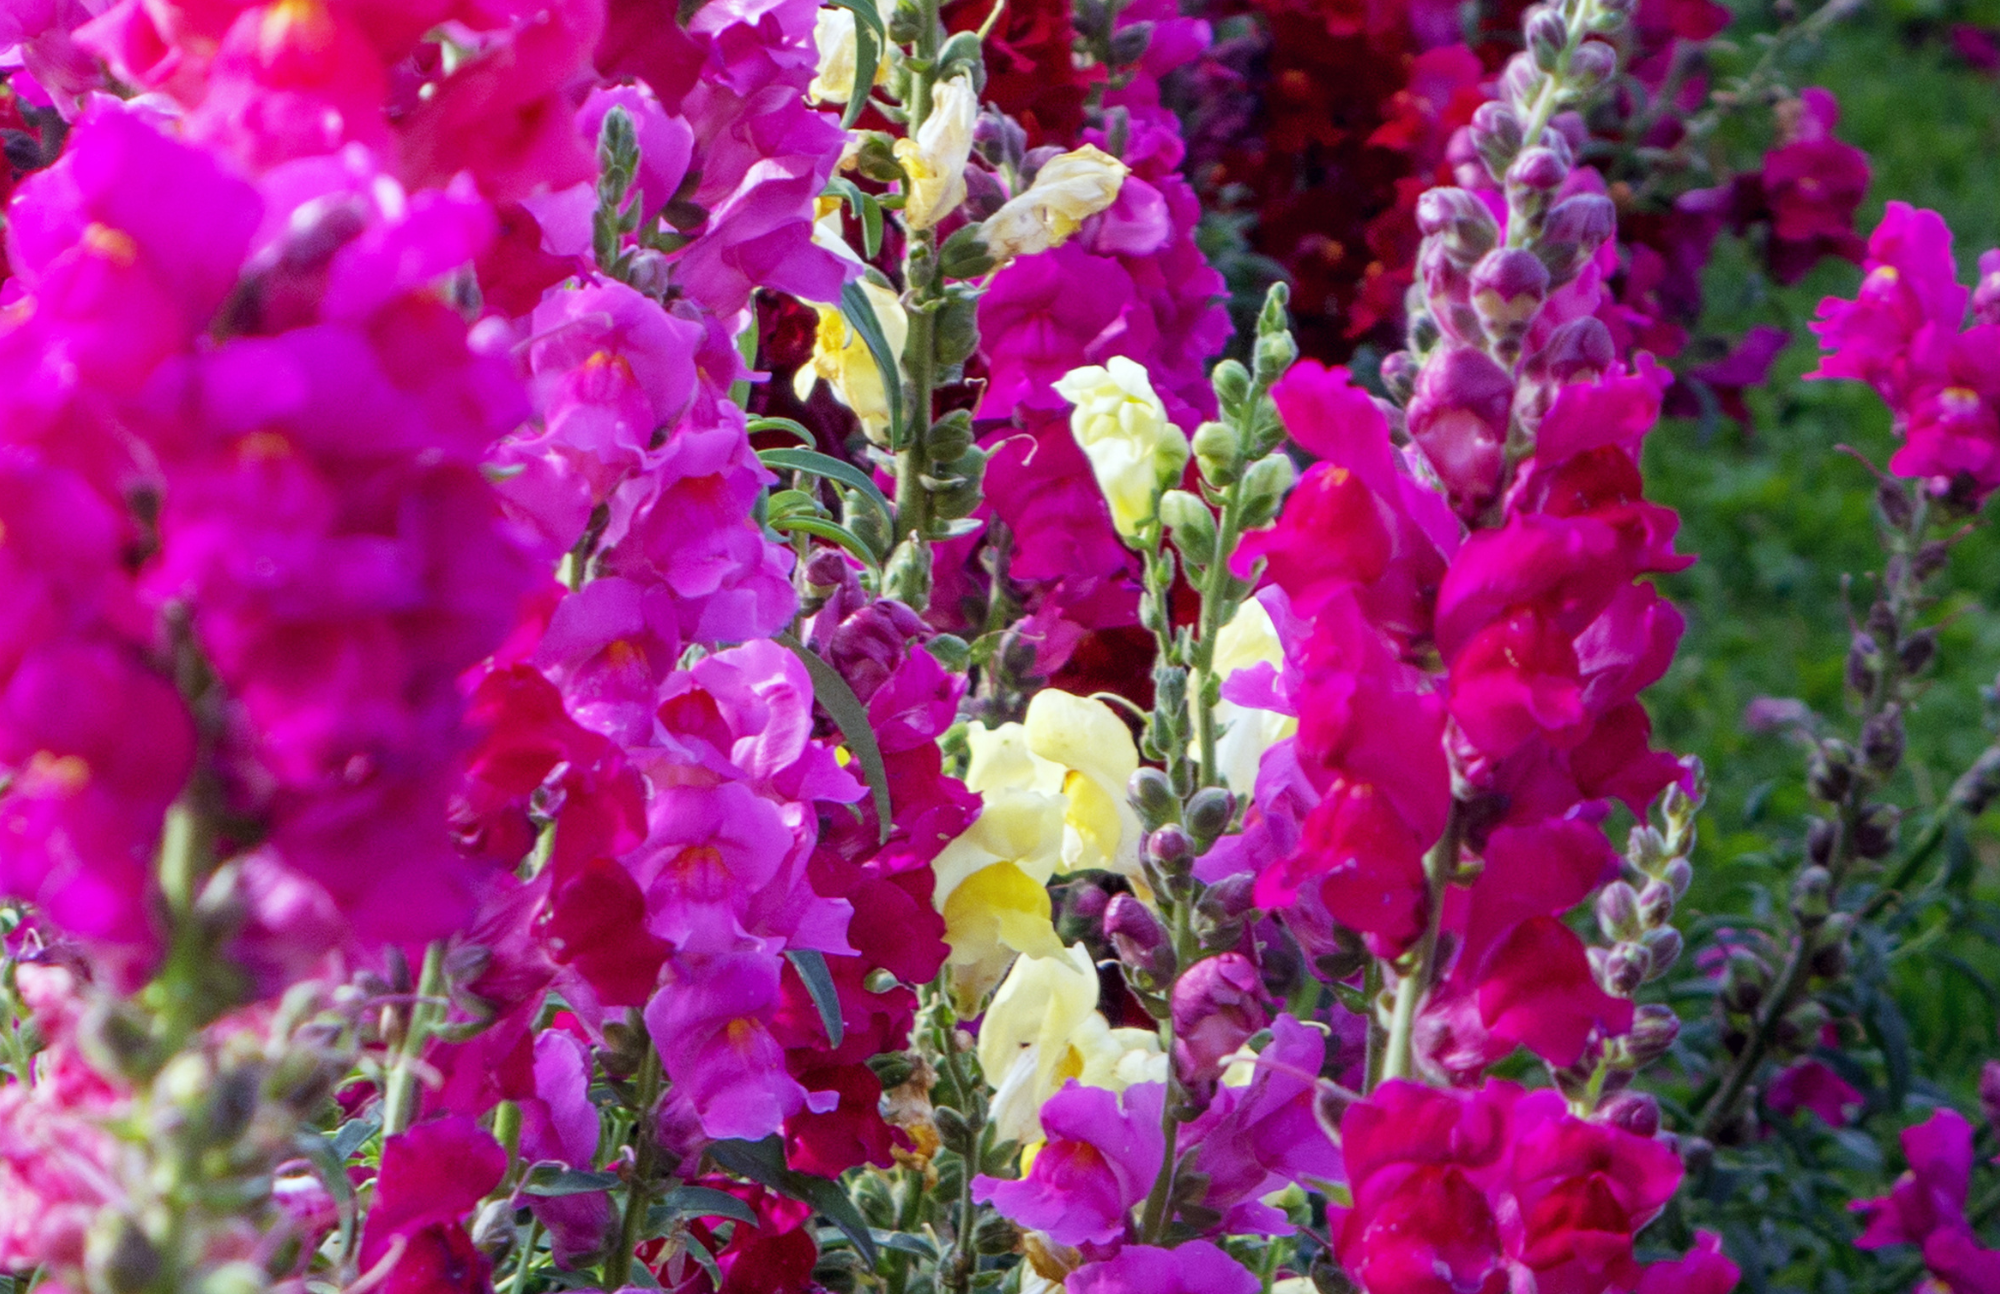
Snapdragons (Antirrhinum majus)
Bloom Time: Snapdragons bloom from late spring to early summer.
Colors: Snapdragons are available in an assortment of hues, including pink, red, yellow, white, and purple.
Unusual Fact: The name “snapdragon” comes from the flower’s unique appearance. When you gently squeeze the sides of the bloom, it opens its “mouth” like a dragon’s, revealing a tongue-like structure inside.
Petunias (Petunia × hybrida)
Bloom Time: Petunias bloom profusely from spring until the first frost in fall.
Colors: Petunias showcase a vibrant spectrum of colors, from bold reds and pinks to soft pastels and striking purples.
Fun Fact: Petunias are popular for their ability to attract hummingbirds with their brightly colored blooms and sweet nectar. These delightful visitors add an extra touch of magic to your garden.
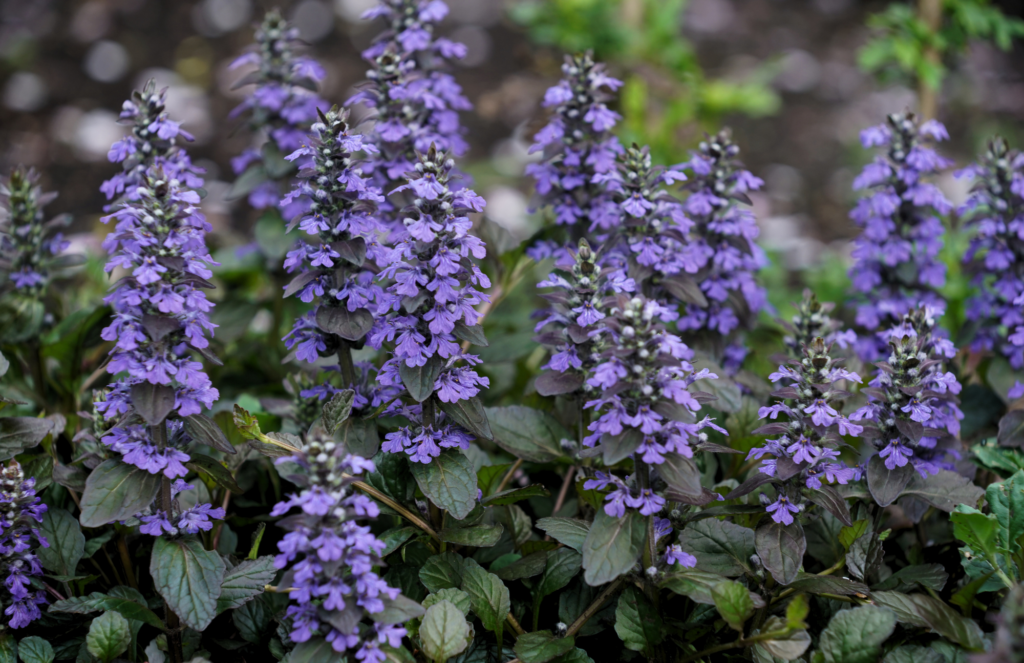
Chocolate Chip Ajuga (Ajuga reptans ‘Chocolate Chip’) Bloom Time: Chocolate Chip Ajuga blesses us with its blooms from late spring to early summer, gracing the garden with its charming presence.
Colors: Its flowers display a range of hues from delicate lavender to deep purple, complementing the rich chocolate tones of its foliage.
Interesting Fact: Beyond its visual appeal, Chocolate Chip Ajuga offers more than meets the eye. Its leaves emit a subtle fragrance when brushed, adding a delightful sensory dimension to the garden. Moreover, like lavender, it holds potential for herbal remedies, contributing both beauty and practicality to your outdoor space.
Dianthus (Dianthus spp.)
Bloom Time: Dianthus blooms from late spring to midsummer.
Colors: Dianthus blooms come in an array of colors, including pink, red, white, purple, and bicolor combinations.
Fabulous Fact: The name “dianthus” is derived from the Greek words “dios,” meaning divine, and “anthos,” meaning flower. These charming flowers have been cherished for centuries for their delicate beauty and delightful fragrance.
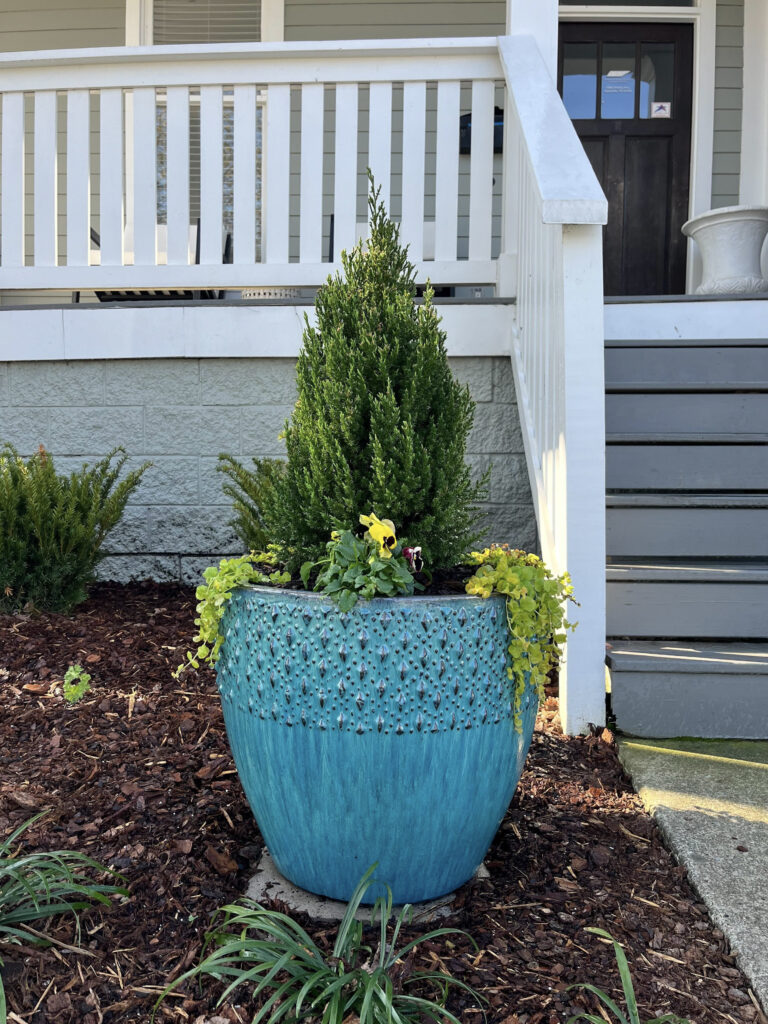
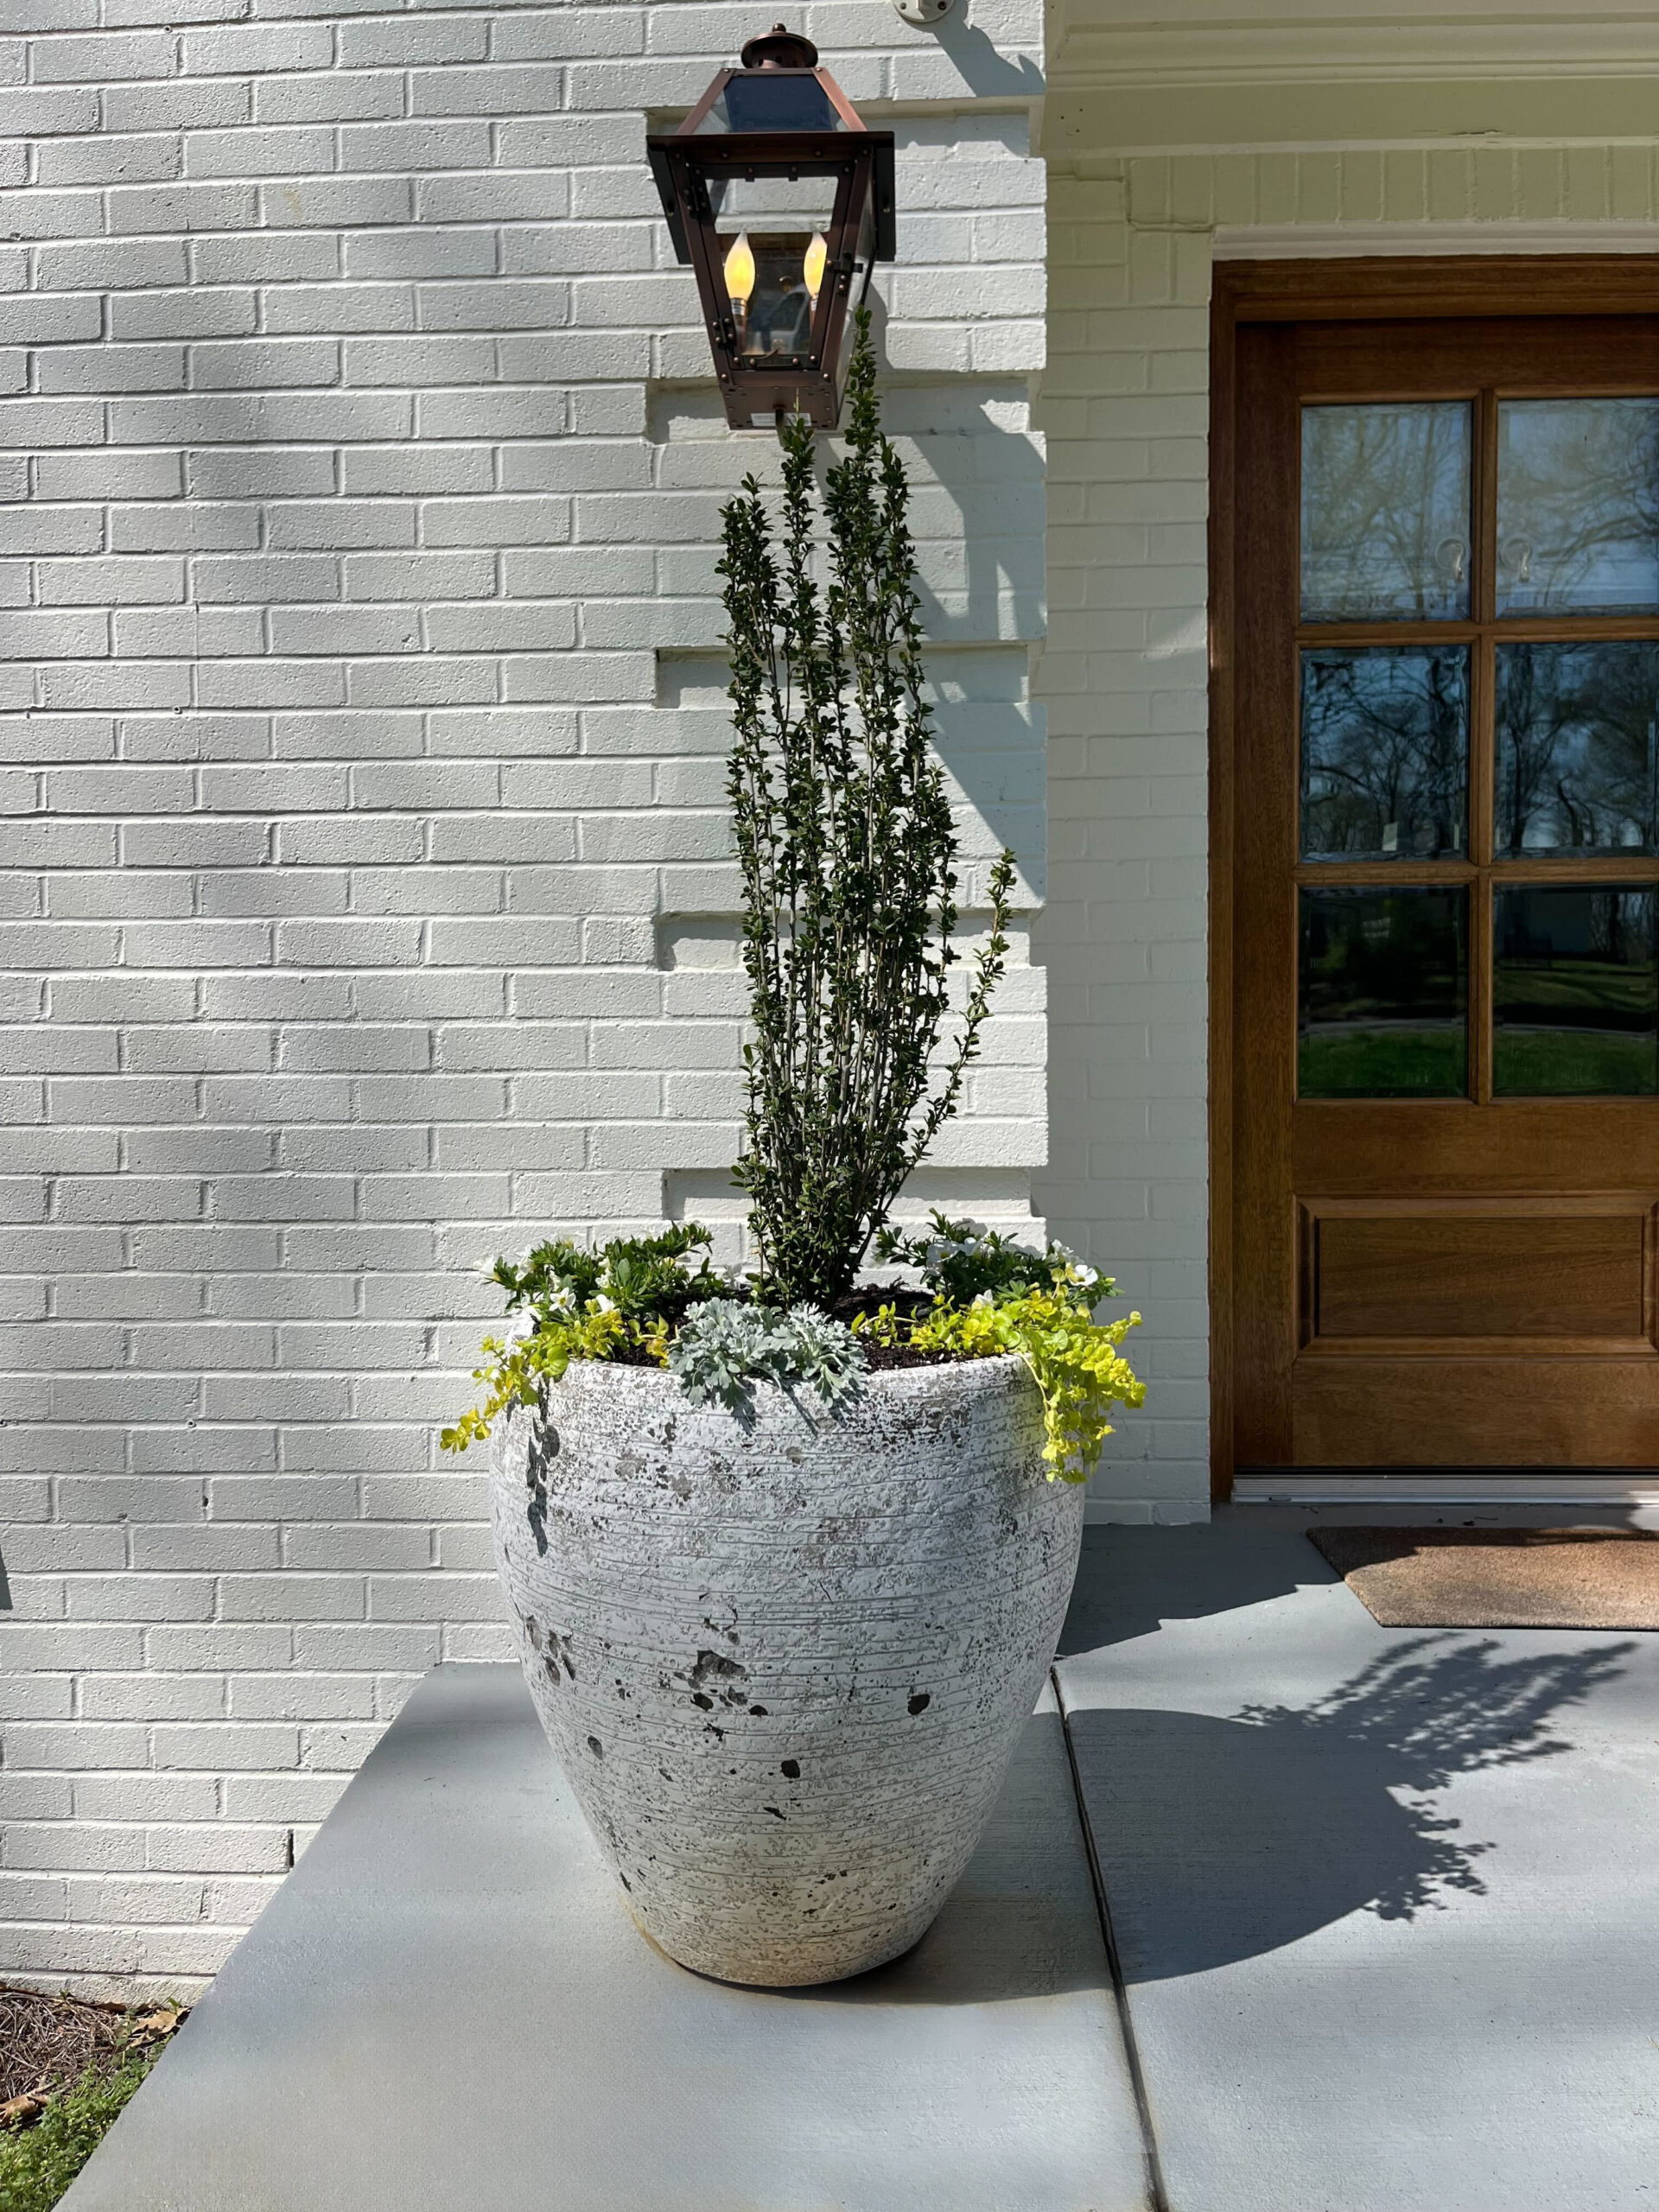
Pots: Elevating Your Style
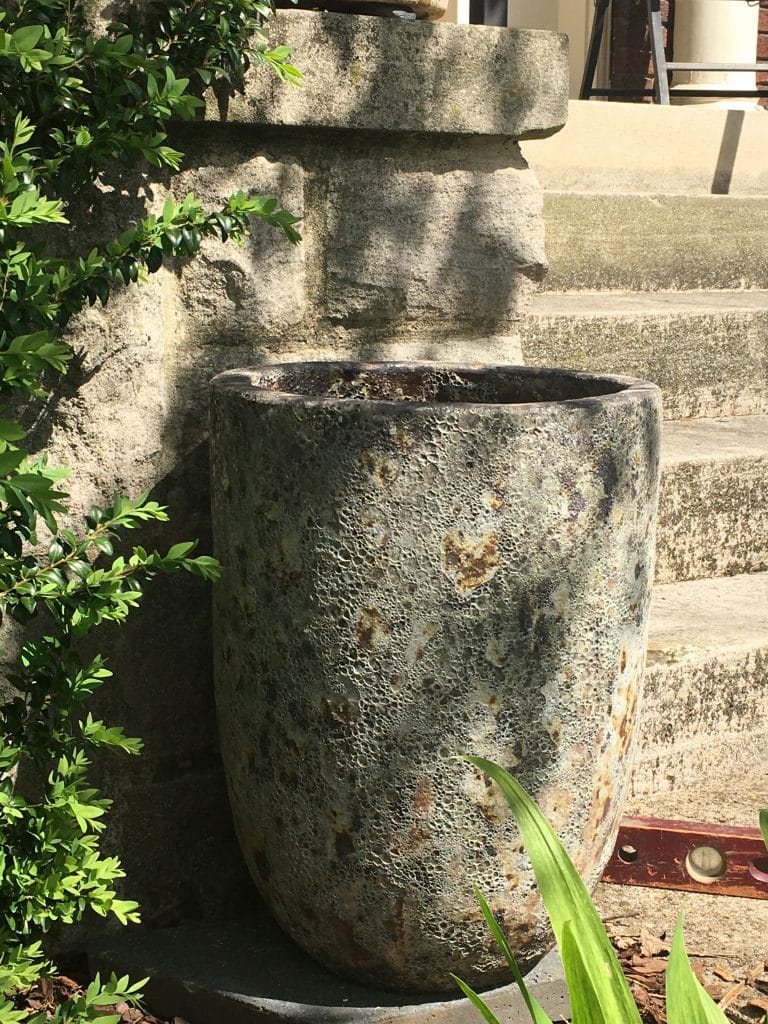
When it comes to selecting pots for your container garden, form doesn’t always follow function. For instance, French country pots often feature rustic charm with distressed finishes and intricate detailing, perfect for adding a touch of vintage elegance to your porch. A great example would be this lovely Bergs pot. On the other hand, modern pots boast clean lines and minimalist designs, ideal for creating a sleek contemporary look. At our garden center, we offer a wide selection of pots in store and online here in various styles to suit your taste and elevate your outdoor decor.
Process: Crafting Your Botanical Ensemble
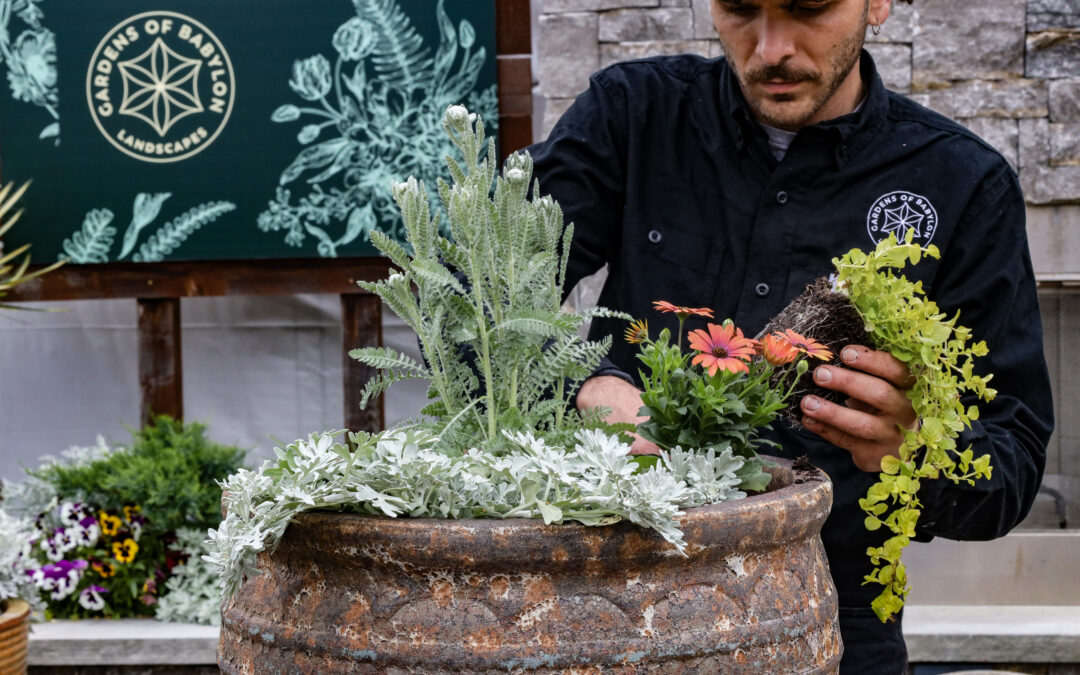
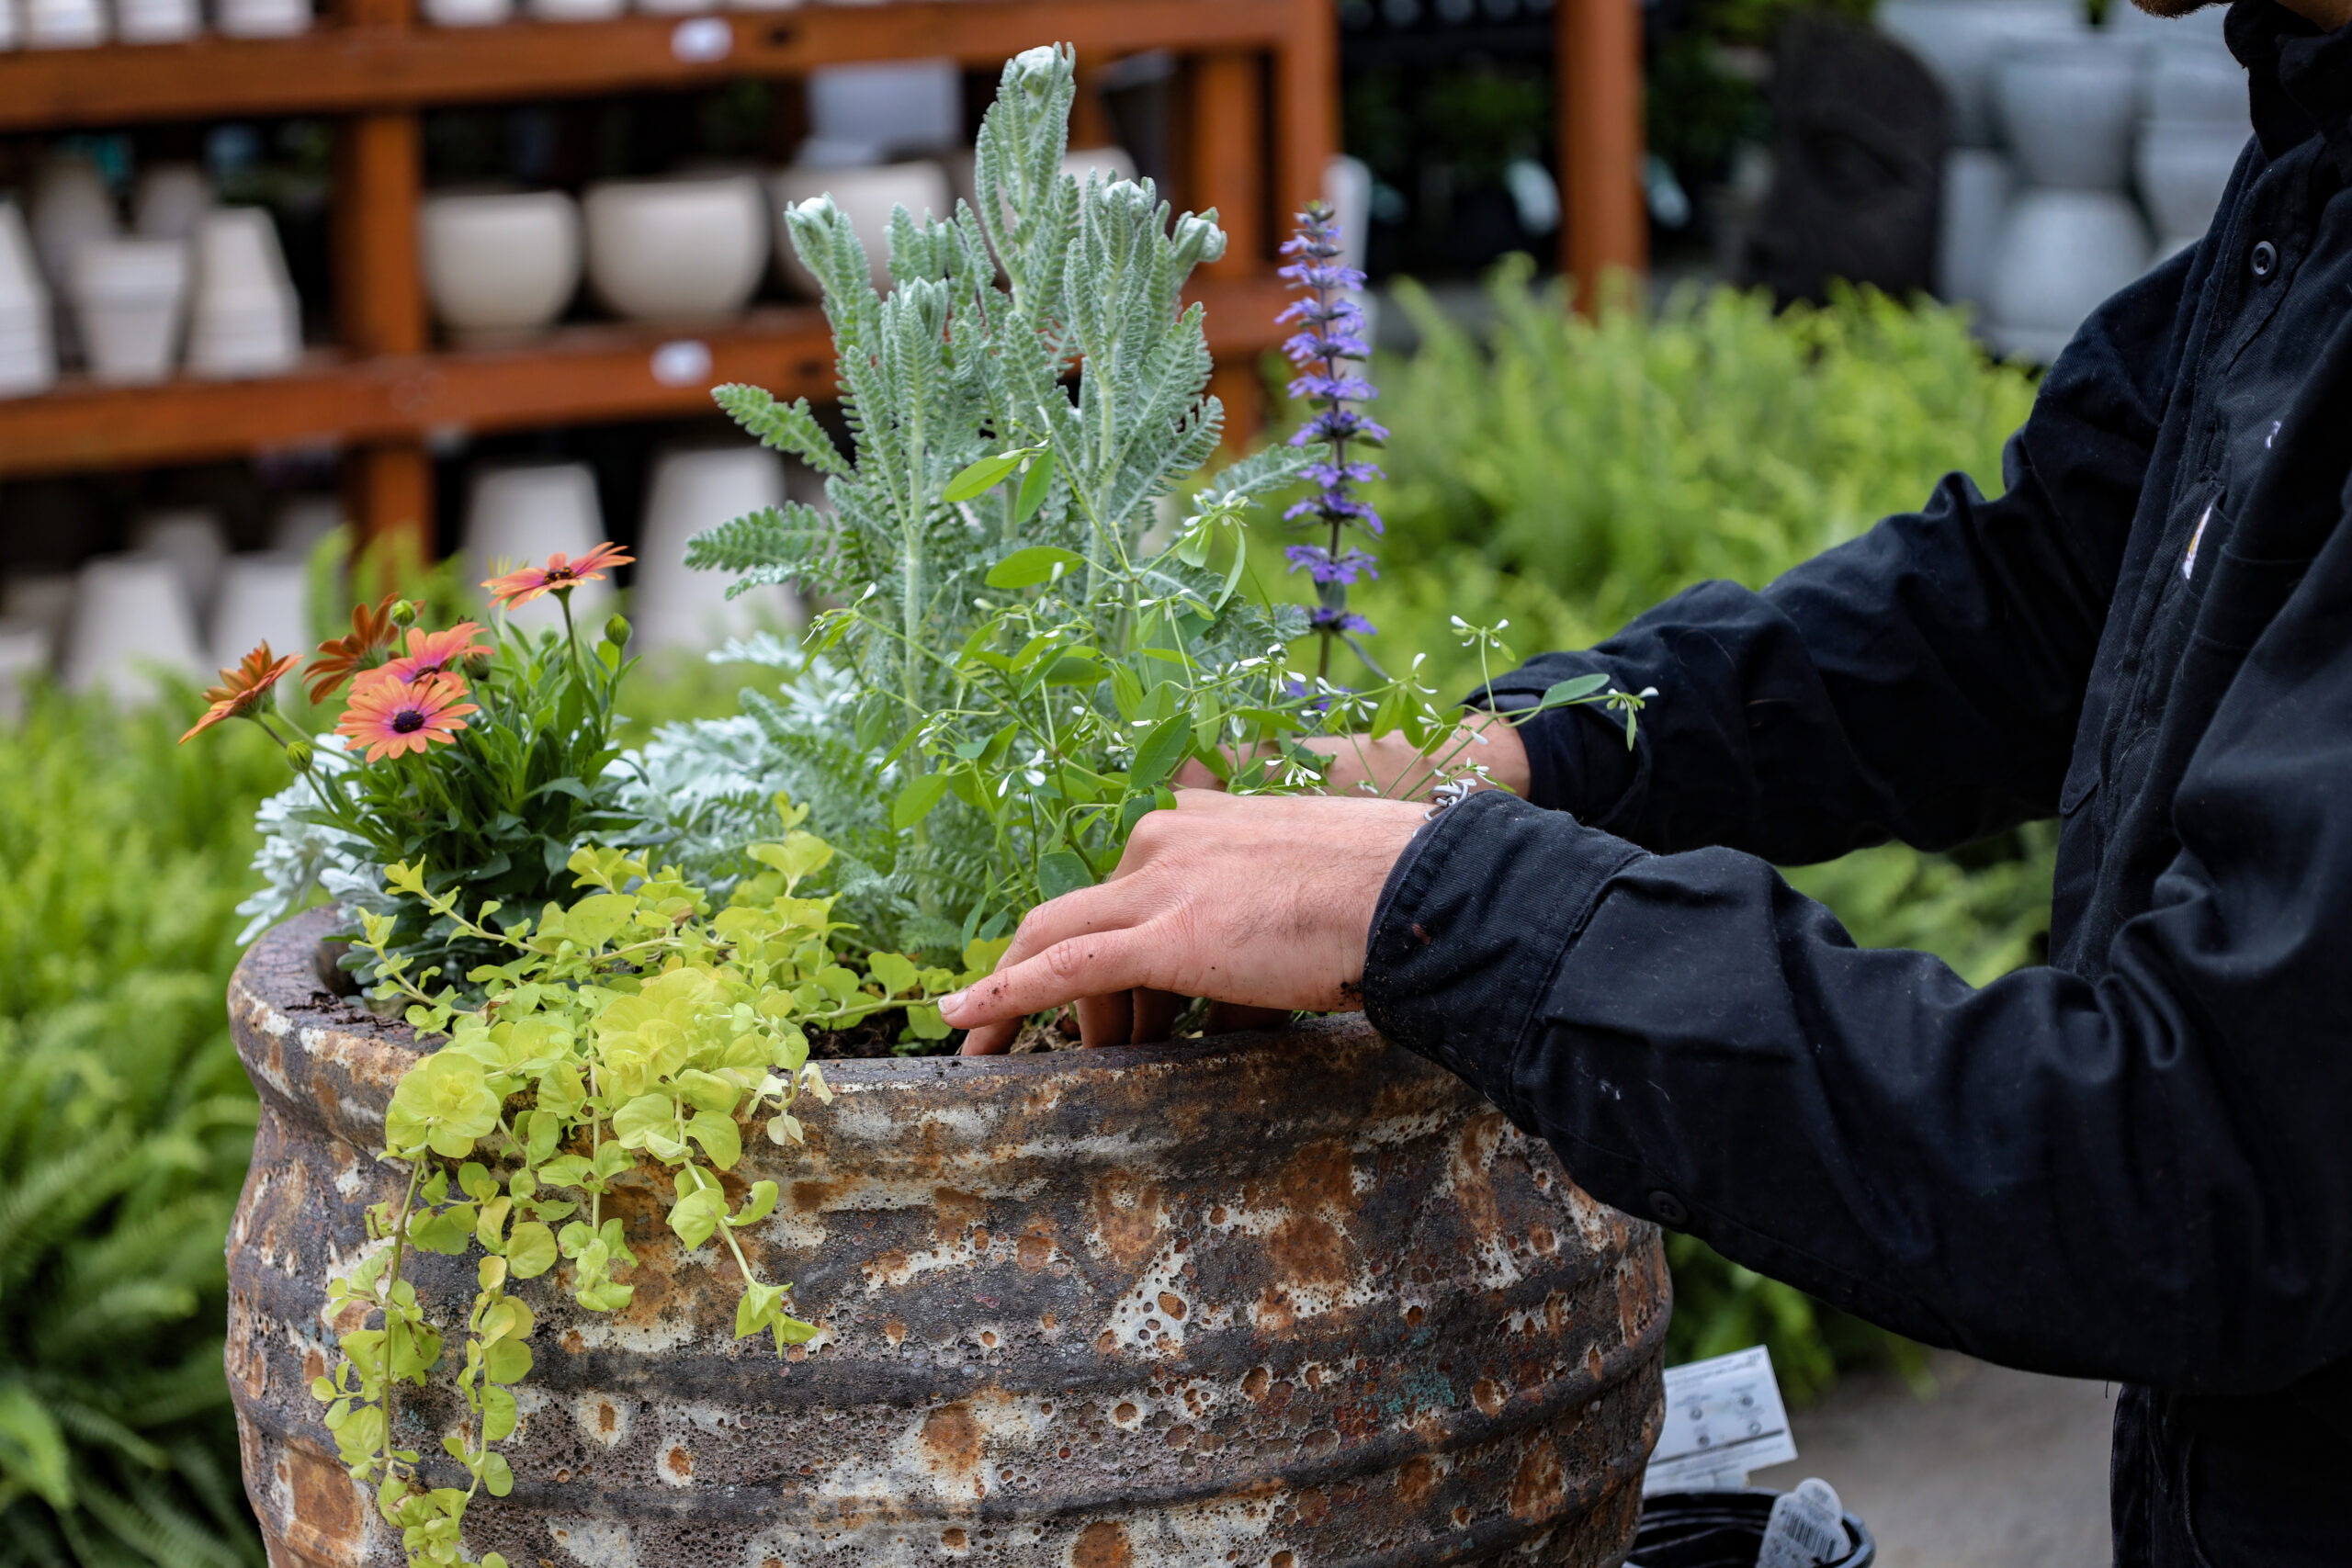
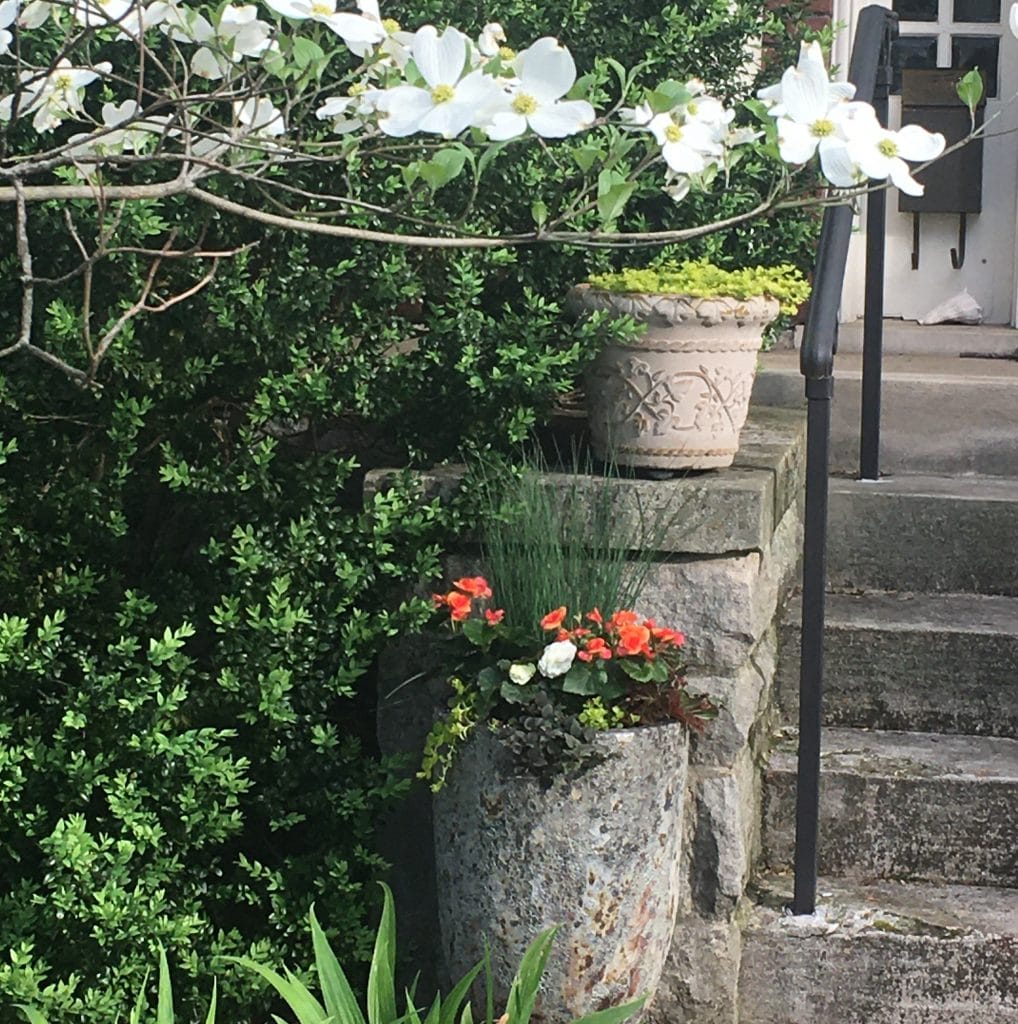
Creating a successful container garden is all about balance and composition, and the “thriller, filler, spiller” technique offers a foolproof formula for achieving stunning results. The “thriller” plant serves as the focal point, adding height and drama to your arrangement. This could be a tall grass like Miscanthus or a striking spike plant such as Dracaena. The “filler” plants, positioned around the thriller, add volume and color, filling in the space between the taller centerpiece and the trailing spillers. Choose plants with contrasting textures and complementary hues to create visual interest. Finally, the “spiller” plants cascade over the edges of the container, softening its edges and adding a sense of movement. Trailing petunias, ivy, and sweet potato vine are excellent choices for spillers.
But don’t forget about soil in our containers. That’s something that most people overlook – they get caught up with the beauty of the flowers. But, actually, the soil is the most important component, because that’s what’s going to feed our beautiful plants and give them nutrients. You want to get the best quality potting soil that you can for your containers with lots of micronutrients. We have great quality soil and different brands to choose from at Gardens of Babylon!
Pro tip: If you have pots that dry out throughout the day, buy some play sand to place in bottom of your containers and this will hold more moisture for you throughout the season!
Ready to bring a splash of color to your porch? Visit the Garden Center to find the right soil, plants, and pots for your project. Our knowledgeable staff is here to help you every step of the way. And if you’re short on time or expertise, don’t hesitate to reach out to our botanical design team – we’ll handle all the work for you, from plant selection to arrangement. Let us help you turn your container garden dreams into reality!
Every spring, I’ve been putting the same tired geraniums on the porch near the front door. This year I decided I needed something different – I mean, don’t we all? – and I’ve chosen to go all-in on a mixed container planting to bring a shot of color to the doorstep. And while I have my own thoughts about what I like in a container, I wanted to get some fresh ideas and pointers that I can pass along. I called on Dana Stein, Gardens of Babylon’s procurement director, who was more than eager to share her knowledge of how to put together successful containers.
Before you begin
You may already have a container, or you may be in the market for a new one. Check out this article for suggestions on how to choose the best container, then fill it with good, high quality planting mix. “Don’t skimp on the soil,” Dana suggests. “Remember that you get what you pay for.” Then let the fun begin.
“The first thing to consider is if your planter will be in sun or shade,” Dana says. That, of course, will determine what you will put in it. A pot on a porch that receives sunshine all day will need sun- and heat-tolerant plants; a porch in dappled or full shade needs plants that don’t need as much sun to thrive. It’s important to know the conditions on your doorstep.
“Go to a good garden center and you’ll find sun-loving plants in one location, shade plants in another,” Dana says. Walk around and think about what you like: “Think about colors. Do you like warm colors? Bright? That will help you narrow it down.” And think about how to put them together for the best look, and what excites you: “Just do a gut check – what makes you happy?”
Thriller, filler, spiller
It’s an old but valid rule for putting together successful container plantings: Start with something tall and bold – a “thriller” plant. Add a mid-size “filler” or two, something that is eye-catching, adds color and texture, and fills the bulk of the garden space. Finally, finish with a “spiller,” something that will trail over the sides to add softness, more texture, and more interest.
“Everyone knows about this; all the pros know it,” Dana says. “Use this formula, and that’s going to make you look like a professional.”
When you plant, begin with the thriller, and consider the angles from which the garden will be seen; if it’s out in the open, place the tall plant in the center of the container and fill in all around it. If the container will be against a wall or other backdrop – as mine will be – place the tallest plant at the back of the pot, and let the fillers and spillers take front and center.
What’s the ideal number of plants to use? As many as it takes. “Pack them in!” Dana suggests. “Make it instant gratification. You want the end result to look like it’s already grown and spilling over, even after it’s just been planted.”
Care and maintenance
Plants are growing, living things, so you have to be attentive to their needs, Dana says. A container garden needs frequent watering, sometimes daily during extremely hot weather. “Put your finger in the soil two inches deep, just to check. Every day,” Dana says. “If it’s over 90 degrees, definitely containers will need to be watered every day.” Ideally, the pot is lifted a bit off the ground with pot feet or risers, she suggests. “When you water, you want to see water come out the bottom of the pot.”
The garden will also need nourishment. “Plants in containers are heavy feeders,” she says. When you water, the nutrients will leach out the bottom.” A good organic fertilizer is a must-have part of the regimen. “It’s like a healthy diet for the plants. They’ll look better if they’re being fed well.”
A bit of cosmetic attention is also necessary. “Just like we need to get haircuts and trim our fingernails. Every so often they need to be deadheaded, clipped and trimmed, especially if things start to get leggy. Get a good pair of pruners and tidy things up a little bit.”
What’s trending in container plantings?
“People are getting out of the box with their containers,” Dana says. Tropical selections that we usually think of as houseplants – snake plant, for instance – are showing up in summer container gardens, and make big statements in a planting. “Also, the oldest plant known to man, reed plants, have been really popular.” This upright, architectural bit of greenery can be an excellent “thriller,” and something a little unusual for a container.
Lower-growing annuals, grasses, and plants that provide texture as well as color are also popular choices for mixed containers, she says. Ivies, thyme and other trailing plants are the “spillers” to look for. “Just think about what makes you happy,” Dana says.
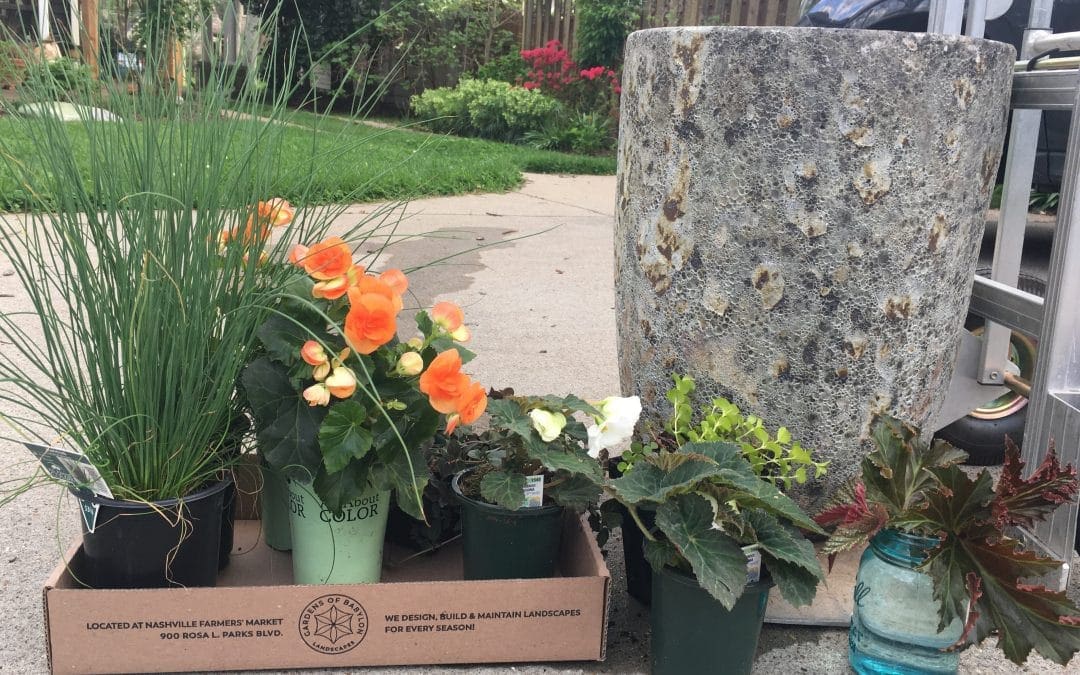
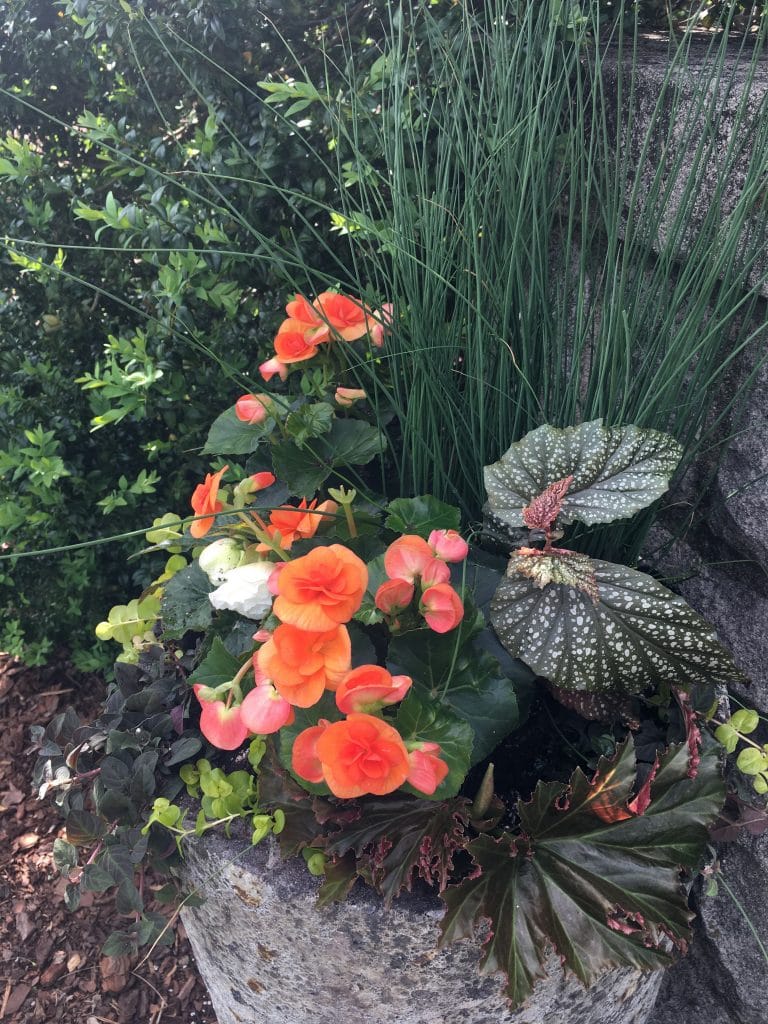
For the container at my doorstep, which will be in dappled shade most of the day, I walked around the garden center and remembered how much I like the more unusual varieties of begonias. I’d planned to start with the tall, architectural vibe that a reedy plant provides – in this case, Equisetumhyemal, or horsetail – but was drawn to the tall, sometimes spiraling growth of Juncus ‘Twisted Arrows.’
I chose two different begonias for their large, showy flowers, Hiemalis ‘Amstel Batik Orange’ and a tuberous variety, ‘Nonstop White.’ To those I added cuttings from two pass-along begonias already in my collection, an angel-wing variety and a type with large frilly leaves – official names unknown. A new, purplish creeping Jenny — Lysimachia ‘Midnight Sun’ — and the bright green Lysimachia variety that I dug out of containers I’ve had for years, spill over the rim of the pot in my new begonia garden.
If the spot for your container garden is sunny, Dana suggests a variety of sun-loving plants: container-size sunflowers, black-and-blue salvia, ‘Million Bells’ petunias, dwarf zinnias, a selection of kitchen herbs – the choices and combinations are endless.
“Remember the ‘thriller-spiller-filler’ rule, and go for the look that makes you happy,” Dana suggests.
Click here to watch Dana Stein demonstrate how to plant a container garden in “Container Planting 101.” Browse the Gardens of Babylon Garden Center, 900 Rosa L. Parks Blvd., for containers and for ideas of what to put in them.
Can you feel it in the air? Spring is on the way! If you plan to grow vegetables, herbs, or flowers this season, now’s the time to start planning. Starting transplants from seeds is an affordable and rewarding way to fill your garden with favorites like tomatoes, peppers, greens, zinnias, and marigolds.
When to Start Seeds Indoors
The best time to start seeds indoors depends on:
The plant’s growth rate (check the seed packet for germination time).
Your local last frost date (Mid-April in Middle Tennessee).
The recommended outdoor planting time.
Here’s a quick guide for popular plants:
Warm-season flowers & veggies (like tomatoes and zinnias) → Start seeds indoors 5–7 weeks before planting outdoors (Early to Mid-March).
Cool-season vegetables (like lettuce, broccoli, and cauliflower) → Start 4–7 weeks before soil is workable (January to February).
Always refer to the seed packet instructions for the best timing and specific planting guidelines.
How to Start Seeds Indoors
Choose a Container – Use a seed-starting tray, peat pots, coir pots, or upcycled containers (milk cartons, egg crates, tin cans). Just make sure they have drainage holes!
Use the Right Soil – Best choice: A light, well-draining seed-starting mix (or a fine-textured potting mix for houseplants like African violets). Avoid: Garden soil—it’s too heavy and may contain weeds or bacteria.
Plant Your Seeds
Fill your container with soil.
Use a pencil to make shallow holes (no deeper than 4x the seed’s diameter).
Drop in one or two seeds per section and cover lightly
Mist the soil gently with a spray bottle to keep it evenly moist.
Cover with clear plastic or a seed-starting lid to retain moisture.
Providing Light & Water
Watering
Check daily! The soil should stay moist but not soggy to prevent damping off (a fungal disease that kills seedlings).
A spray bottle is best to avoid disturbing the seeds.
Lighting
Place trays in a bright window with plenty of natural light.
If natural light is limited, use a grow light set on a 14–16 hour timer (positioned 6–12 inches above the seedlings).
Bonus Tip: Use a small fan to create gentle air circulation. This strengthens plant stems and reduces mold.
Transplanting & Hardening Off
As seedlings grow, they’ll need more space:
Transplant into larger pots (peat or coir pots are great, as they can go directly into the ground).
Hardening off: Before planting outdoors, gradually expose seedlings to outdoor conditions for a few hours each day over a week.
Planting time: In Middle Tennessee, cool-weather crops go out in late February/March, while summer vegetables and flowers can be planted mid to late April.
Starting seeds indoors is a fun and rewarding way to get a jumpstart on spring gardening. Stop by Gardens of Babylon to pick up seeds and supplies, and let’s grow something great together!
Even if you don’t have a personal patch of soil, you can still have a garden. If you have space to plant a garden in the ground, you also want to enhance your porch, patio or deck. That’s the advantage and beauty of container gardening.
But how do you choose the best container for the job? It depends on what you want it to do – fill a nook on your small balcony? Grow a tree on your patio? There’s a pot for every purpose.
Choose your size
Any living thing needs room to grow, so you’ll want a container that provides enough space for roots to spread in the soil. A general rule for a single plant or shrub is to choose a pot that is roughly twice the size of the root ball of the plant you’ll put in it. If it’s too small, the plant’s roots will quickly fill it up; if it’s too large, the roots may struggle to reach the moisture they need, and admit it, a small plant looks awkward in a big, spacious expanse of pot and soil.
Size also depends on whether you’re potting up that single plant, or a container garden with a mix of annuals, perennials or herbs. For an attractive mix, you want a container that is proportionate to the size of the little garden as it matures, and that still provides enough room in the soil for each plant’s roots to absorb the nutrients it needs.
Whatever size is selected, make sure it has a hole to allow water to drain through. Most plants that sit in waterlogged soil will struggle, and likely not survive.
Choose your style
If the look you prefer to cultivate in your space is buttoned-up formal, of course you’ll choose a container that reflects that style – possibly with clean, crisp lines and colors and shapes that match the rest of the landscape and furnishings. If you style is more eclectic, you may go for an assortment of colors and finishes, and they may or may not be similar.
Modern, contemporary style containers may have a sleek finish, unique shapes or bold colors. Garden classics may be in subtle “natural” shades and embellished with simple or ornate details.
In my own garden and patio areas, for example, I have an eclectic mix of pots: tall containers that hold large ‘Kimberly Queen’ ferns in spring, summer and fall, mid-height pots for geraniums or angel-wing begonias, and short, wide bowls that I plant with sedums, or with Creeping Jenny that flows like water over the bowl’s rim. Most of the pots are in shades of blues and greens, but I’m also fond of the look of moss-covered clay pots, so I use those, too, usually planted with annuals and tucked into garden beds to fill empty spaces among the perennials.
Consider the shape & material
When you’re thinking of what shape to use – round, square, rectangular, tapered – consider the spaces where the planted containers will be displayed. Round planters tend to have a more solid, organic feel; square, boxy planters are good for adding symmetry in a garden layout. A rectangular planter may provide the horizontal lines needed in a formal or informal design; gently tapering square or rectangular planters seem to have a softening effect in a variety of style settings. Flat and bowl-shaped planters can be attractive tabletop features.
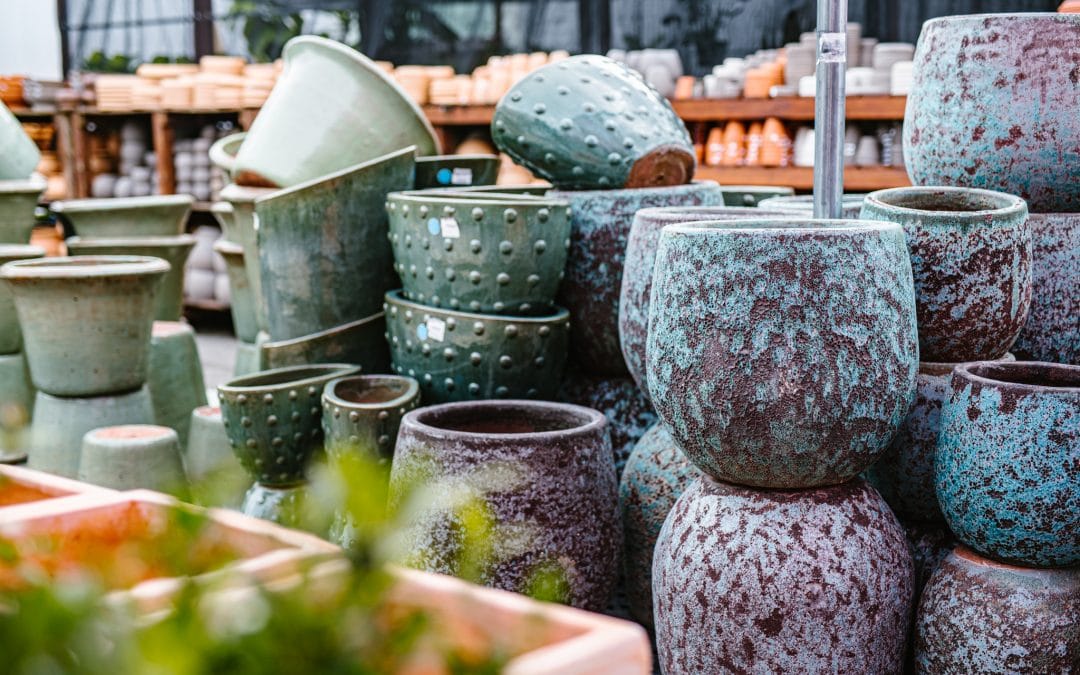
Glazed ceramic, which is available in a range of textures and colors, is a popular choice for outdoor container gardens. If you plan to leave containers outdoors all year, make sure they are the type that can withstand freezing weather. Large containers are heavy, and very stable in an outdoor setting.
Terra cotta pots, which can be plain or decorative, are porous and provide good drainage. They also dry out more quickly than glazed pots, so you likely will need to water more often. Because of their porosity, terra cotta needs to be moved to a protected location before freezing weather arrives.
Ready to find the perfect pot? Stroll through Gardens of Babylon’s Garden Center to see a wide range of containers of all sizes, from the tiniest clay pot to large, deep containers suitable for a small tree.
My name is Dana and I’m with Gardens of Babylon and today I’m going to share with you my success tips for container planting so that your containers will look professional!
What kind of soil is the best for container planting?
So let’s talk about soil in our containers. That’s something that most people overlook – they get caught up with the beauty of the flowers. But, actually, the soil is the most important component, because that’s what’s going to feed out beautiful plants and give them nutrients. You want to get the best quality potting soil that you can for your containers. And I love to use one that’s rated for outdoor containers; it already has some micronutrients in it. We have lots of great quality soil and lots of different brands to choose from at Gardens of Babylon!
Pro tip: If you have pots that dry out a lot or if they’re in the hot sun you can actually buy some play sand and put it in the bottom of your containers and that will actually hold more moisture for you throughout the season! That way, you don’t have to be watering multiple times a day.
Decorate your Porch
There’s three design elements for your containers that you can follow – you need a thriller (something eye-catching), a spiller (a plant that cascades over the edges of the pot), and a filler (something to fill space between the larger plants)!
I always love to incorporate ornamental grasses because they’re gonna be very vertical and that there’s movement which I love. If you want this to be seen from the road and kind of have some curb appeal and you want people to turn their head I always incorporate yellow! You just sort of notice yellow and it always makes you turn your head! I also love to add some white flowers, especially if you’re gonna do a lot of big bold colors! White is that design element that brings all the colors together.
You always want to fertilize your plants as well, it’s sort of like giving your plants vitamins! I love to use flower tone.
Whatever brand you decide to use you just want to use it per package direction whatever it says. So I would then sprinkle in my fertilizer, water this in really well. As if your planters are flushed to the ground on your patio or porch it’s always helpful to get some little legs or prop them up with bricks so that there’s a little bit of air movement underneath your planters because what happens is our soil will kind of settle and if it’s right there flush with your patio or your porch it could clog and it could actually cause water to sort of sit in the bottom and rot our roots. So it’s always a good idea to kind of lift up our pots up off the ground so that that water can drain out throughout the season.
Plant love being pruned
So let’s talk about plant maintenance throughout the year. So just like we cut our fingernails or go get haircuts our plants actually need some maintenance throughout the year and if not they get scraggly they don’t bloom as well so, I just wanna let you know that plants love to be pruned.
Feel free, you’re not hurting them in any way they actually love it when you trim them and actually promote some new growth and it keeps them bushier and healthier. So what I would do especially with Coleus they tend, they tend to get sort of leggy you can always just go and take your pruners or sometimes just your fingernails and just snip off right here right before a leaf node, and I’ll show you on this one on the future what I would do is I would take my pruners and just prune the right there.
You can always just trim off any leaves that have gotten hits and then that what that’s gonna do is create, it’s gonna send a hormone when it down to this leaf node, it’s gonna signal to the plant I can go ahead and grow some more and gave new buds. Same with this there’s always just gonna be some like little scraggly leaves, just look you know you can you should even take your fingernail. Now this is just normal you know plants are just gonna they’re living creatures and they gonna require just a little bit of maintenance.
So we’ve talked about fertilizer and soil and plant care and this is gonna help set you up for success so, don’t be shy plants are very forgiving and go have fun!